

How To Use Silicone Sealant For DIY Home Repairs
Apr 13, 2026
Leave a message

Silicone sealant is a flexible and indispensable product for DIY home maintenance tasks. Whether you're sealing gaps around windows, fixing leaks in the bathroom, or safeguarding surfaces from moisture damage, silicone is the top choice. That said, applying silicone sealant correctly can be challenging without proper guidance.
1. Why Choose Silicone Sealant?
Silicone sealant is widely favored for several key reasons:
- Waterproof Performance: Perfect for bathrooms, kitchens, and windows, silicone forms a tight watertight barrier to stop leaks.
- Flexibility: Even after curing, silicone stays flexible, making it ideal for areas that are prone to movement-such as around window frames.
- Longevity: High-quality silicone products, like those in Eurocell's lineup, resist cracking, shrinking, and fading over time.
Common uses include:
- Sealing gaps in tiles, sinks, or countertops.
- Weatherproofing window and door frames to keep out drafts.
- Repairing cracks in outdoor surfaces like patios or walkways.
2. Tools and Materials You'll Need
Before you begin, collect the following items:
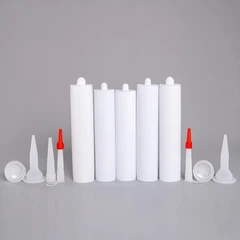
- A tube of high-quality silicone sealant.
- A silicone sealant gun.
- Masking tape to ensure clean, neat edges.
- A sealant smoothing tool or your finger (coated in soapy water).
- A utility knife for cutting the tip of the sealant tube.
- Cleaning supplies: rubbing alcohol, a cloth, or a sponge to prepare the surface properly.
3. Step-by-Step Guide to Applying Silicone Sealant
Step 1: Prepare the Area
- Thoroughly clean the surface to eliminate dirt, grease, or old sealant residue. Rubbing alcohol works best for this task.
- Let the area dry completely-moisture can hinder the sealant's ability to adhere properly.
Step 2: Protect Surrounding Surfaces
- Apply masking tape along both sides of the gap you're sealing to achieve clean, straight lines.
- This step is particularly useful for beginners or when working on visible areas of your home.
Step 3: Load the Silicone Gun
- Cut the nozzle of the silicone tube at a 45-degree angle, matching the size of the gap you need to seal.
- Insert the tube into the silicone gun and gently squeeze the trigger to prime the gun (ensure sealant is ready to dispense).
Step 4: Apply the Sealant
- Hold the gun at a 45-degree angle and apply steady, consistent pressure to release the silicone.
- Move the gun slowly along the gap, making sure the sealant covers the area evenly. Avoid stopping midway to prevent uneven application.
Step 5: Smooth the Sealant
- Use a sealant smoothing tool or a gloved finger dipped in soapy water to smooth out the silicone.
- Work quickly, as silicone begins to cure within just a few minutes.
Step 6: Remove Masking Tape
- Carefully peel off the masking tape before the sealant fully cures. This prevents the silicone from sticking to the tape and ruining the clean edges.
Step 7: Allow the Sealant to Cure
- Check the product's packaging for the recommended curing time, which usually ranges from 24 to 48 hours.
- Avoid getting the sealant wet during this curing period to ensure it bonds properly.
4. Common Mistakes to Avoid
- Applying Too Much Silicone: Overusing sealant leads to messy results. Always cut the nozzle to a size that matches the gap.
- Skipping Surface Preparation: Failing to clean and dry the area properly will weaken the sealant's adhesion.
- Not Smoothing the Sealant: Uneven or rough edges not only look unprofessional but can also compromise the effectiveness of the seal.
5. Where to Use Silicone Sealant at Home
- Bathrooms: Seal around bathtubs, showers, and sinks to prevent water damage to walls and floors.
- Kitchens: Fill gaps around countertops, splashbacks, and sinks to keep out moisture and food residue.
- Windows and Doors: Weatherproof frames to block drafts and moisture from entering your home.
- Outdoors: Repair cracks in outdoor tiles, pathways, or around garden fixtures to prevent further damage from the elements.
6. How to Remove Old or Damaged Silicone
If you need to replace old silicone, follow these steps:
- Use a utility knife or a specialized sealant remover tool to cut and lift the old silicone from the surface.
- Clean the area with rubbing alcohol to remove any remaining residue.
- Apply new sealant following the step-by-step guide above.
7. Maintenance Tips for Long-Lasting Results
- Clean Regularly: Use mild cleaning products to prevent mold and mildew buildup, especially in damp areas like bathrooms.
- Inspect Annually: Check the seals around windows and doors for signs of wear and reapply silicone if necessary.
- Avoid Abrasive Cleaners: Harsh cleaning products can damage the sealant and reduce its flexibility over time.
Why Choose Eurocell Silicone Sealants?
Eurocell offers a comprehensive range of silicone sealants designed for both DIY and professional use. Their products stand out for:
- Durability and resistance to cracking and shrinking.
- Easy application and strong adhesion to various surfaces.
- A variety of types to suit different projects-from kitchens and bathrooms to outdoor use.
Browse their range to find the perfect silicone sealant for your DIY home repair project.
Silicone sealant is a must-have for any DIY enthusiast. By following this guide, you can tackle home repair tasks with confidence and achieve results that look professional. From waterproofing your bathroom to sealing windows against the weather, silicone helps make your home more functional, efficient, and protected.
Send Inquiry