

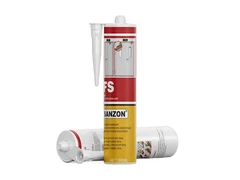

Silicone Sealant For Cleanroom Panel Joints
Nov 10, 2026
Leave a message
Why the joint is part of the room design
Cleanrooms rely on controlled surfaces, airflow and operating procedures. Joints between wall panels, ceilings and service penetrations must be considered as part of that complete design. A compatible sealant can help create a continuous, cleanable joint where the room specification calls for it. The correct material depends on the facility, cleaning routine and panel system.
Pharmaceutical production, electronics assembly and food processing may have different requirements. A sealant described as sanitary or low odor is not automatically approved for all cleanrooms. Ask the room designer and material supplier for the documentation relevant to the intended facility, and confirm any local or project-specific requirements before purchasing.
Select for the actual environment
Start with the panel face, frame finish, flooring interface and adjacent plastics or coatings. Adhesion should be checked on the exact materials, because painted and laminated surfaces can vary between suppliers. Cleaning agents and disinfectants also matter: request compatibility information for the concentrations, contact times and cleaning frequency used by the facility.
Discuss the need for low emissions, particle control, chemical resistance or other project requirements with the design team. Do not treat a single marketing label as proof of suitability. Obtain the technical and safety data sheets, relevant test reports and any declarations requested by the end user. Review whether the specified product is appropriate for the intended exposure and cleaning process.
Prepare, apply and cure
Before installation, coordinate access, environmental controls and protection of nearby equipment. Surfaces must be sound and prepared according to the sealant and panel manufacturers. Remove contaminants without damaging coatings, and use only approved cleaners and primers. Where joint movement is expected, follow the designed width, depth and backing detail rather than filling a void without a plan.
Apply a continuous bead and tool it as directed to achieve contact with the joint faces. A smooth finish can make cleaning easier, but appearance alone does not establish adhesion. Respect the stated working time and protect the area while curing. One-part products cure at a rate influenced by bead dimensions, temperature and humidity; a dry surface does not necessarily mean the joint has cured throughout.
Plan acceptance and maintenance
Agree on inspection criteria before work starts. Check for missed sections, voids, poor adhesion and contamination, then complete any tests required by the project. Return the area to service only after the product has cured and the facility's cleaning and release procedures have been completed.
For ongoing maintenance, retain the sealant grade, batch, location, installation date and approved cleaning method. If a joint becomes damaged, determine whether movement, cleaning chemicals or surface preparation contributed to the problem. Use a repair method compatible with the existing panel and sealant, and obtain approval for any material change. A documented system supports a cleaner installation and makes future repairs easier to manage.
Send Inquiry