

How to Replace Mould-Damaged Shower Silicone: A Step-by-Step DIY Guide
Mar 06, 2026
Leave a message

Siliconing a shower is a handy DIY task that's well within reach for any homeowner-with a bit of patience and careful execution, you can achieve professional-looking results. When done correctly, the silicone creates a seamless, watertight barrier that prevents water seepage, keeps edges and gaps protected, and adds a clean, polished finish to your shower space.
While proper application is crucial, the success of the job hinges even more on thorough preparation-skip this step, and even the most carefully applied silicone will fail to adhere properly. Below, we break down the entire process of replacing mould-damaged shower silicone, from prepping the area to finishing the seal, to ensure your shower stays waterproof and looks sharp for years to come.
1. Deep Clean & Prep the Area (The Most Critical Step!)
Before touching a tube of silicone, you must eliminate all traces of old, mouldy sealant and ensure the surface is spotlessly clean, dry, and free of debris. Mould growth on old silicone not only looks unsightly but also weakens the bond, so thorough removal is non-negotiable.
Remove old silicone: Start by gently prying off the existing mouldy silicone with a plastic scraper or utility knife-avoid sharp metal tools that can scratch shower tiles, acrylic, or glass. For stubborn residue, use a silicone remover solvent (follow the product instructions carefully) to dissolve leftover bits, then wipe clean.
Clear debris and dust: Use a stiff-bristled brush to scrub away dirt, mould spores, and loose grime from the gap or edge being sealed. Follow up with a vacuum to suck up all fine particles, ensuring no dust remains in the area.
Dry the surface thoroughly: Wipe the area down with a damp microfiber cloth to remove any remaining grime, then buff it dry with a clean, dry cloth. Let the surface air-dry for 10–15 minutes-even a hint of moisture will prevent the new silicone from sticking.
Mask for crisp edges: To achieve clean, straight lines (and protect surrounding surfaces from excess silicone), apply blue painter's tape along both sides of the gap. Leave a 3mm gap between the tape and the seam-this ensures the silicone bead is neat and defined once finished. Remove any tape that overlaps onto the tiles or glass.
2. Prep Your Silicone Gun & Silicone Nozzle
Prepping your tools ensures a smooth, consistent application-no messy drips or uneven beads here!
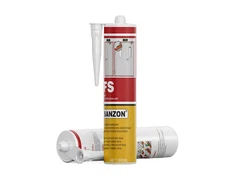
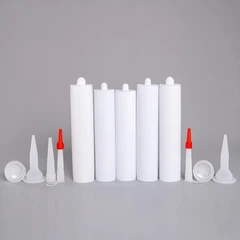
Cut the nozzle: Take a sharp utility knife and cut the silicone nozzle at a 45° angle, 5–20mm from the tip. The size of the cut depends on the width of your gap: start with a smaller cut (5–10mm) for narrow seams, and widen it to 15–20mm for deeper gaps if needed. It's always easier to trim the nozzle further than to fix a too-large bead!
Load the cartridge: Insert the silicone cartridge into the caulking gun, making sure the nozzle points forward. Squeeze the gun's trigger gently until the silicone reaches the nozzle-this removes air bubbles and ensures a steady flow once you start applying.
3. Apply the Silicone Precisely
The key to a professional silicone application is consistency in speed, pressure, and angle.
Fill deep gaps first (if needed): For gaps deeper than 5mm, add a small, preliminary bead of silicone to fill the cavity first. Use your finger (wetted slightly) to press the silicone firmly into the gap-this ensures no air pockets remain, which could cause the seal to fail later.
Apply the main bead: Hold the caulking gun at a 30–45° angle to the surface, starting at one corner of the shower (e.g., the wall-to-floor corner). Squeeze the trigger gently to release the silicone, then move slowly and steadily along the edge, maintaining consistent pressure. Pause only if you need to reposition the gun-stopping and starting can create uneven lumps or gaps.
Stick to one continuous line: For most shower edges (wall-to-shower panel, floor-to-shower tray), a single bead is sufficient. Avoid overlapping runs of silicone, as this leads to thick, messy buildup that's hard to smooth.
4. Smooth & Finish the Silicone
The final step is to shape the silicone for a watertight, sleek finish-this is where you fix any unevenness and ensure the seal is airtight.
Option 1: Wet Finger (Simplest Method)
Dip your index finger in warm, soapy water (this prevents silicone from sticking!) and run it along the silicone bead in one smooth motion. The soap acts as a lubricant, creating a smooth, uniform finish. Keep a clean cloth handy to wipe away any excess silicone that squeezes out from the sides.
Option 2: Damp Sponge
For a slightly softer finish, use a damp (not soaking wet) sponge to glide along the bead. Wring out the sponge thoroughly first-too much water will dilute the silicone and weaken the bond. Wipe away any smudges on surrounding tiles or glass immediately.
Option 3: Silicone Finishing Tool (Professional Look)
For crisp, custom shapes (e.g., concave, convex, or rounded edges), use a silicone finishing tool. Lightly mist the silicone bead with a fine spray of water to prevent the tool from sticking, then drag the tool along the seam in one direction. The tool creates a consistent, polished profile that's far neater than a finger or sponge.
Pro Tips for All Shower Seams
Repeat these same steps for every corner and joint in your shower: wall-to-shower tray corners, around shower heads, faucet bases, and bath-to-wall edges. The core principles-clean, dry surfaces, consistent application, and careful smoothing-apply universally.
Once applied, let the silicone cure fully (check the product label-most take 24–48 hours to set completely). Avoid using the shower or exposing the area to water during this time. With these steps, your mould-damaged silicone will be replaced with a durable, waterproof seal that keeps your shower looking and performing its best!
Send Inquiry